I thought I would offer some ideas on different ways to open box lids. My main motivation has been finding a good way for lifting the lid of small Halloween coffin props, but the techniques can be used for many other applications as well.
I love to play around making these things as a hobby, but I need to make smaller versions of these because I don’t have enough room for full-sized ones. Here’s an example of a nice full-sized one by MrTmartindale on YouTube.
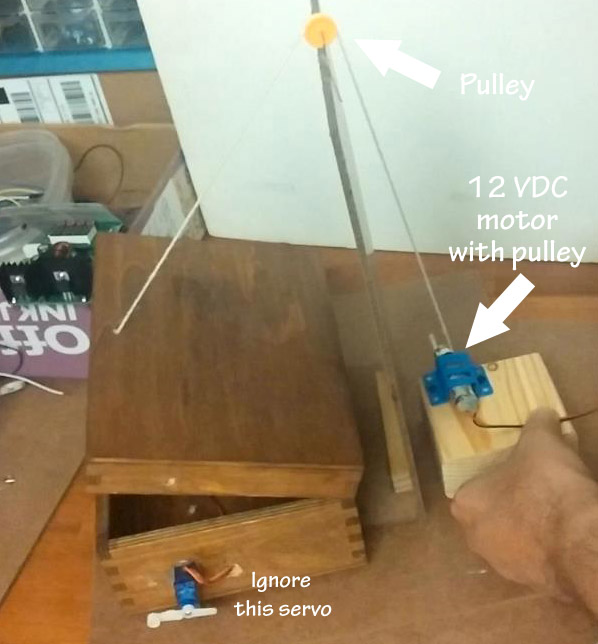
Seeing as I was recently playing around with pulleys I thought I would start with probably the most basic way to lift a lid — with a string!
There are a lot of potential problems with this arrangement:
It’s visible.
You need to reverse the polarity on the motor for up and down directions.
It takes up a lot of space.
It needs a lot of parts: string, string pulley, pulley support, motor, motor pulley, motor mount, and some way to reverse the motor direction.
In my previous post I talked about using a motor, a cam, and a switch to fire a solenoid. That just wasn’t going to work because it was too hard to get the right pace of the solenoid firing. The motor voltage changed its speed, and it was too difficult to adjust the cam shape and to fire the solenoid properly.
In this post I’m showing how I used the Arduino Nano to control the firing rate of the solenoid instead of a rotating cam. With the Arduino, it’s a 30-second program change to adjust the rate of the solenoid firing as opposed to the ridiculously difficult process with motor and cams.
The video below shows the solenoid firing once per second by using the default settings in the sample ‘Blink’ program that is included with the Arduino. Then I made a simple program change in the Arduino to speed up the solenoid. This is soooo much easier than cams and motors!
Trying to find a way to mount things like motors, solenoids and switches is often a big challenge. Trying to find the right bracket, the right screws, and the right locations for those items in your experimental projects can be tough.
So I thought I’d show a few tips and tricks that I use.
First, my goal: I was trying to set up a little solenoid to bang against a miniature box to make a ‘chattering’ effect for a mini ‘monster in a box’ project, kind of like this Halloween monster in a box video (fast forward to about 1 min, 25 seconds to see the box chatter).
I started by experimenting with a little hobby motor. It wasn’t powerful enough to attach a cam straight away to rattle the box on its own so I had to find gears or levers, or something, to get some mechanical advantage.
The box in the video uses a cam attached to an electric drill, but I wanted something much smaller for my little project.
I started out using a cam to trigger a micro switch, which would energize a solenoid in rapid succession. (See my next post to see the solenoid fire.)
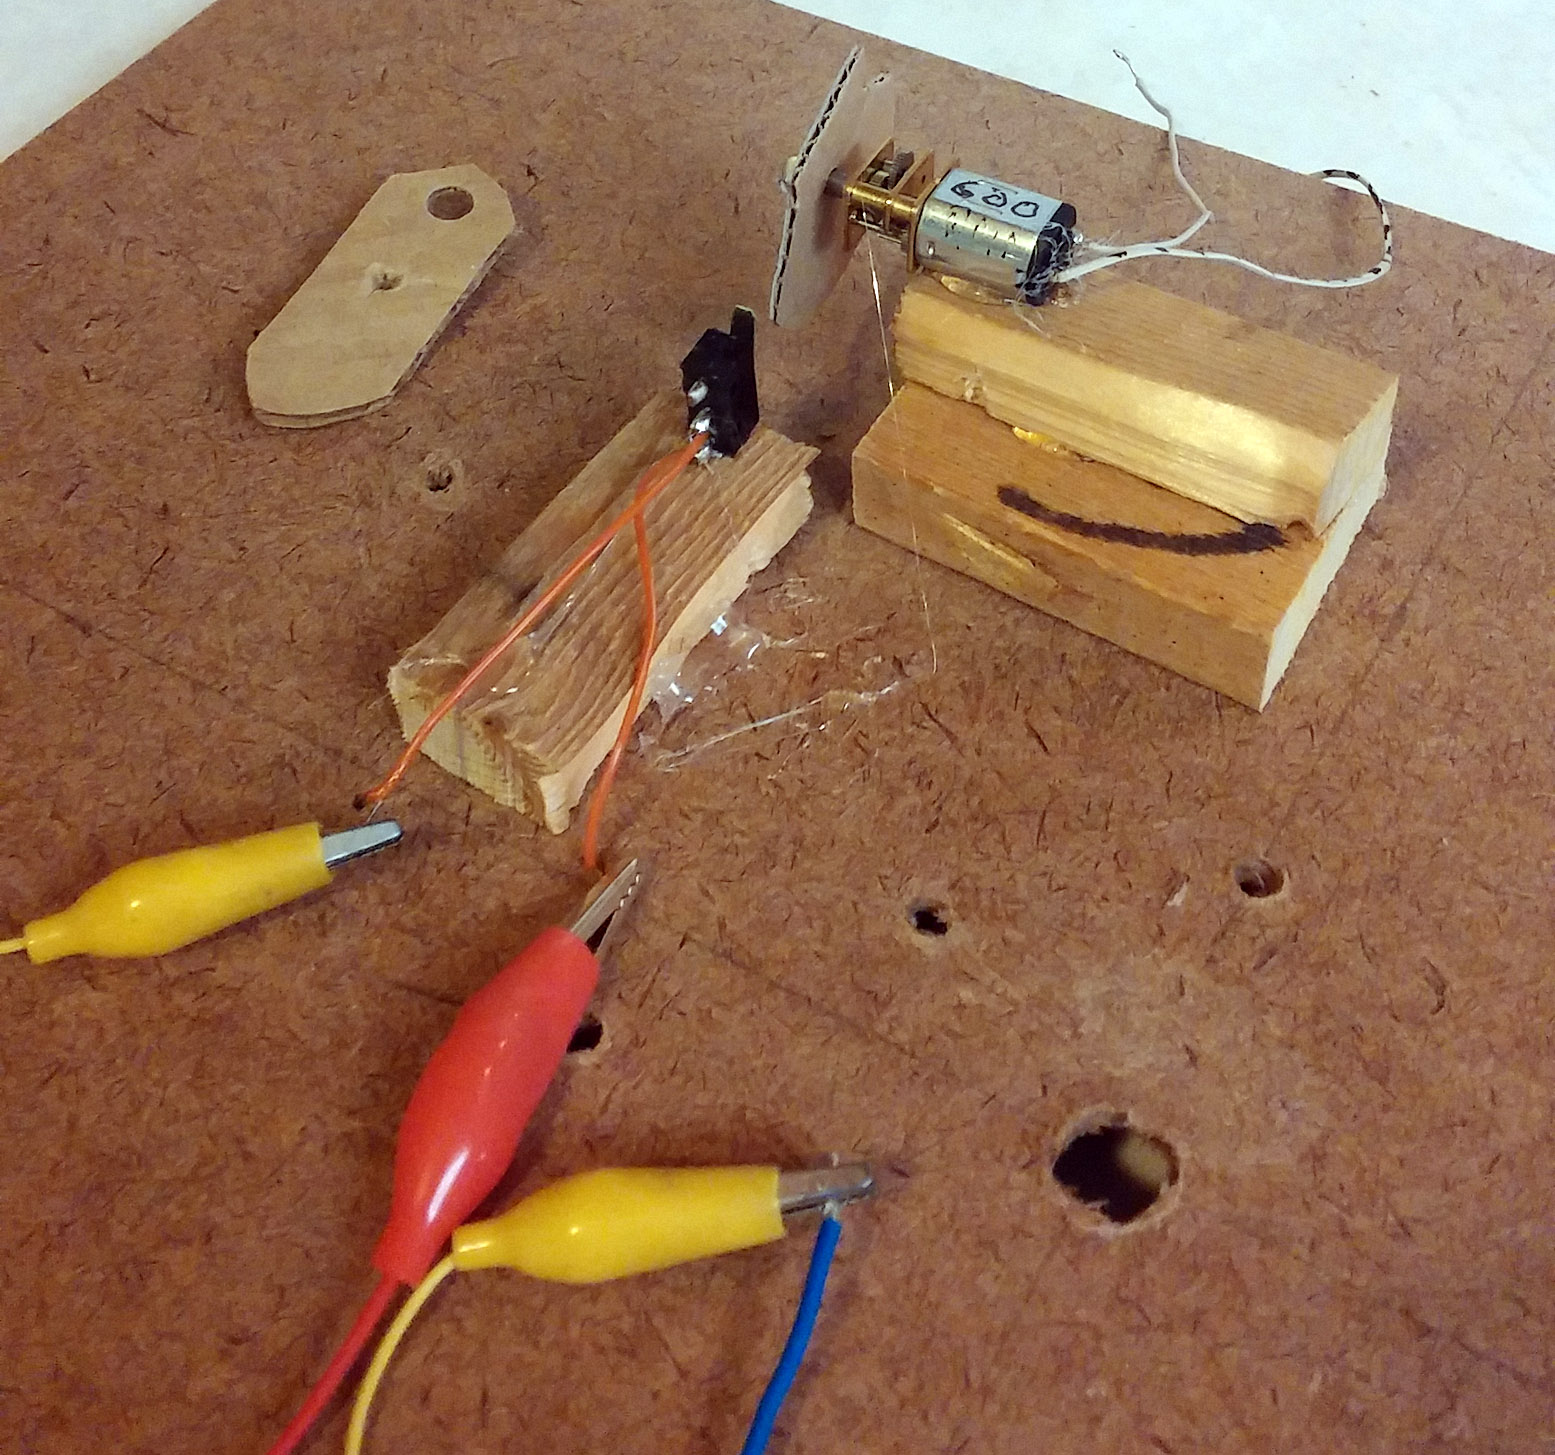
Instead of trying to find the right size and shape of a motor mount for my initial testing of things, I just used hot glue to secure some little blocks of wood to my test base (a 12″ square piece of press board). Then I put a little dab of hot glue on the motor and on the micro switch to secure them to the proper height of wood blocks.
Click on the photos to see larger versions.
Using blocks of wood is a fantastically simple way to make the right heights and locations. I was able to put away my box of sheet metal, tin snips, and other miscellaneous hard-to-use metal mounting hardware!
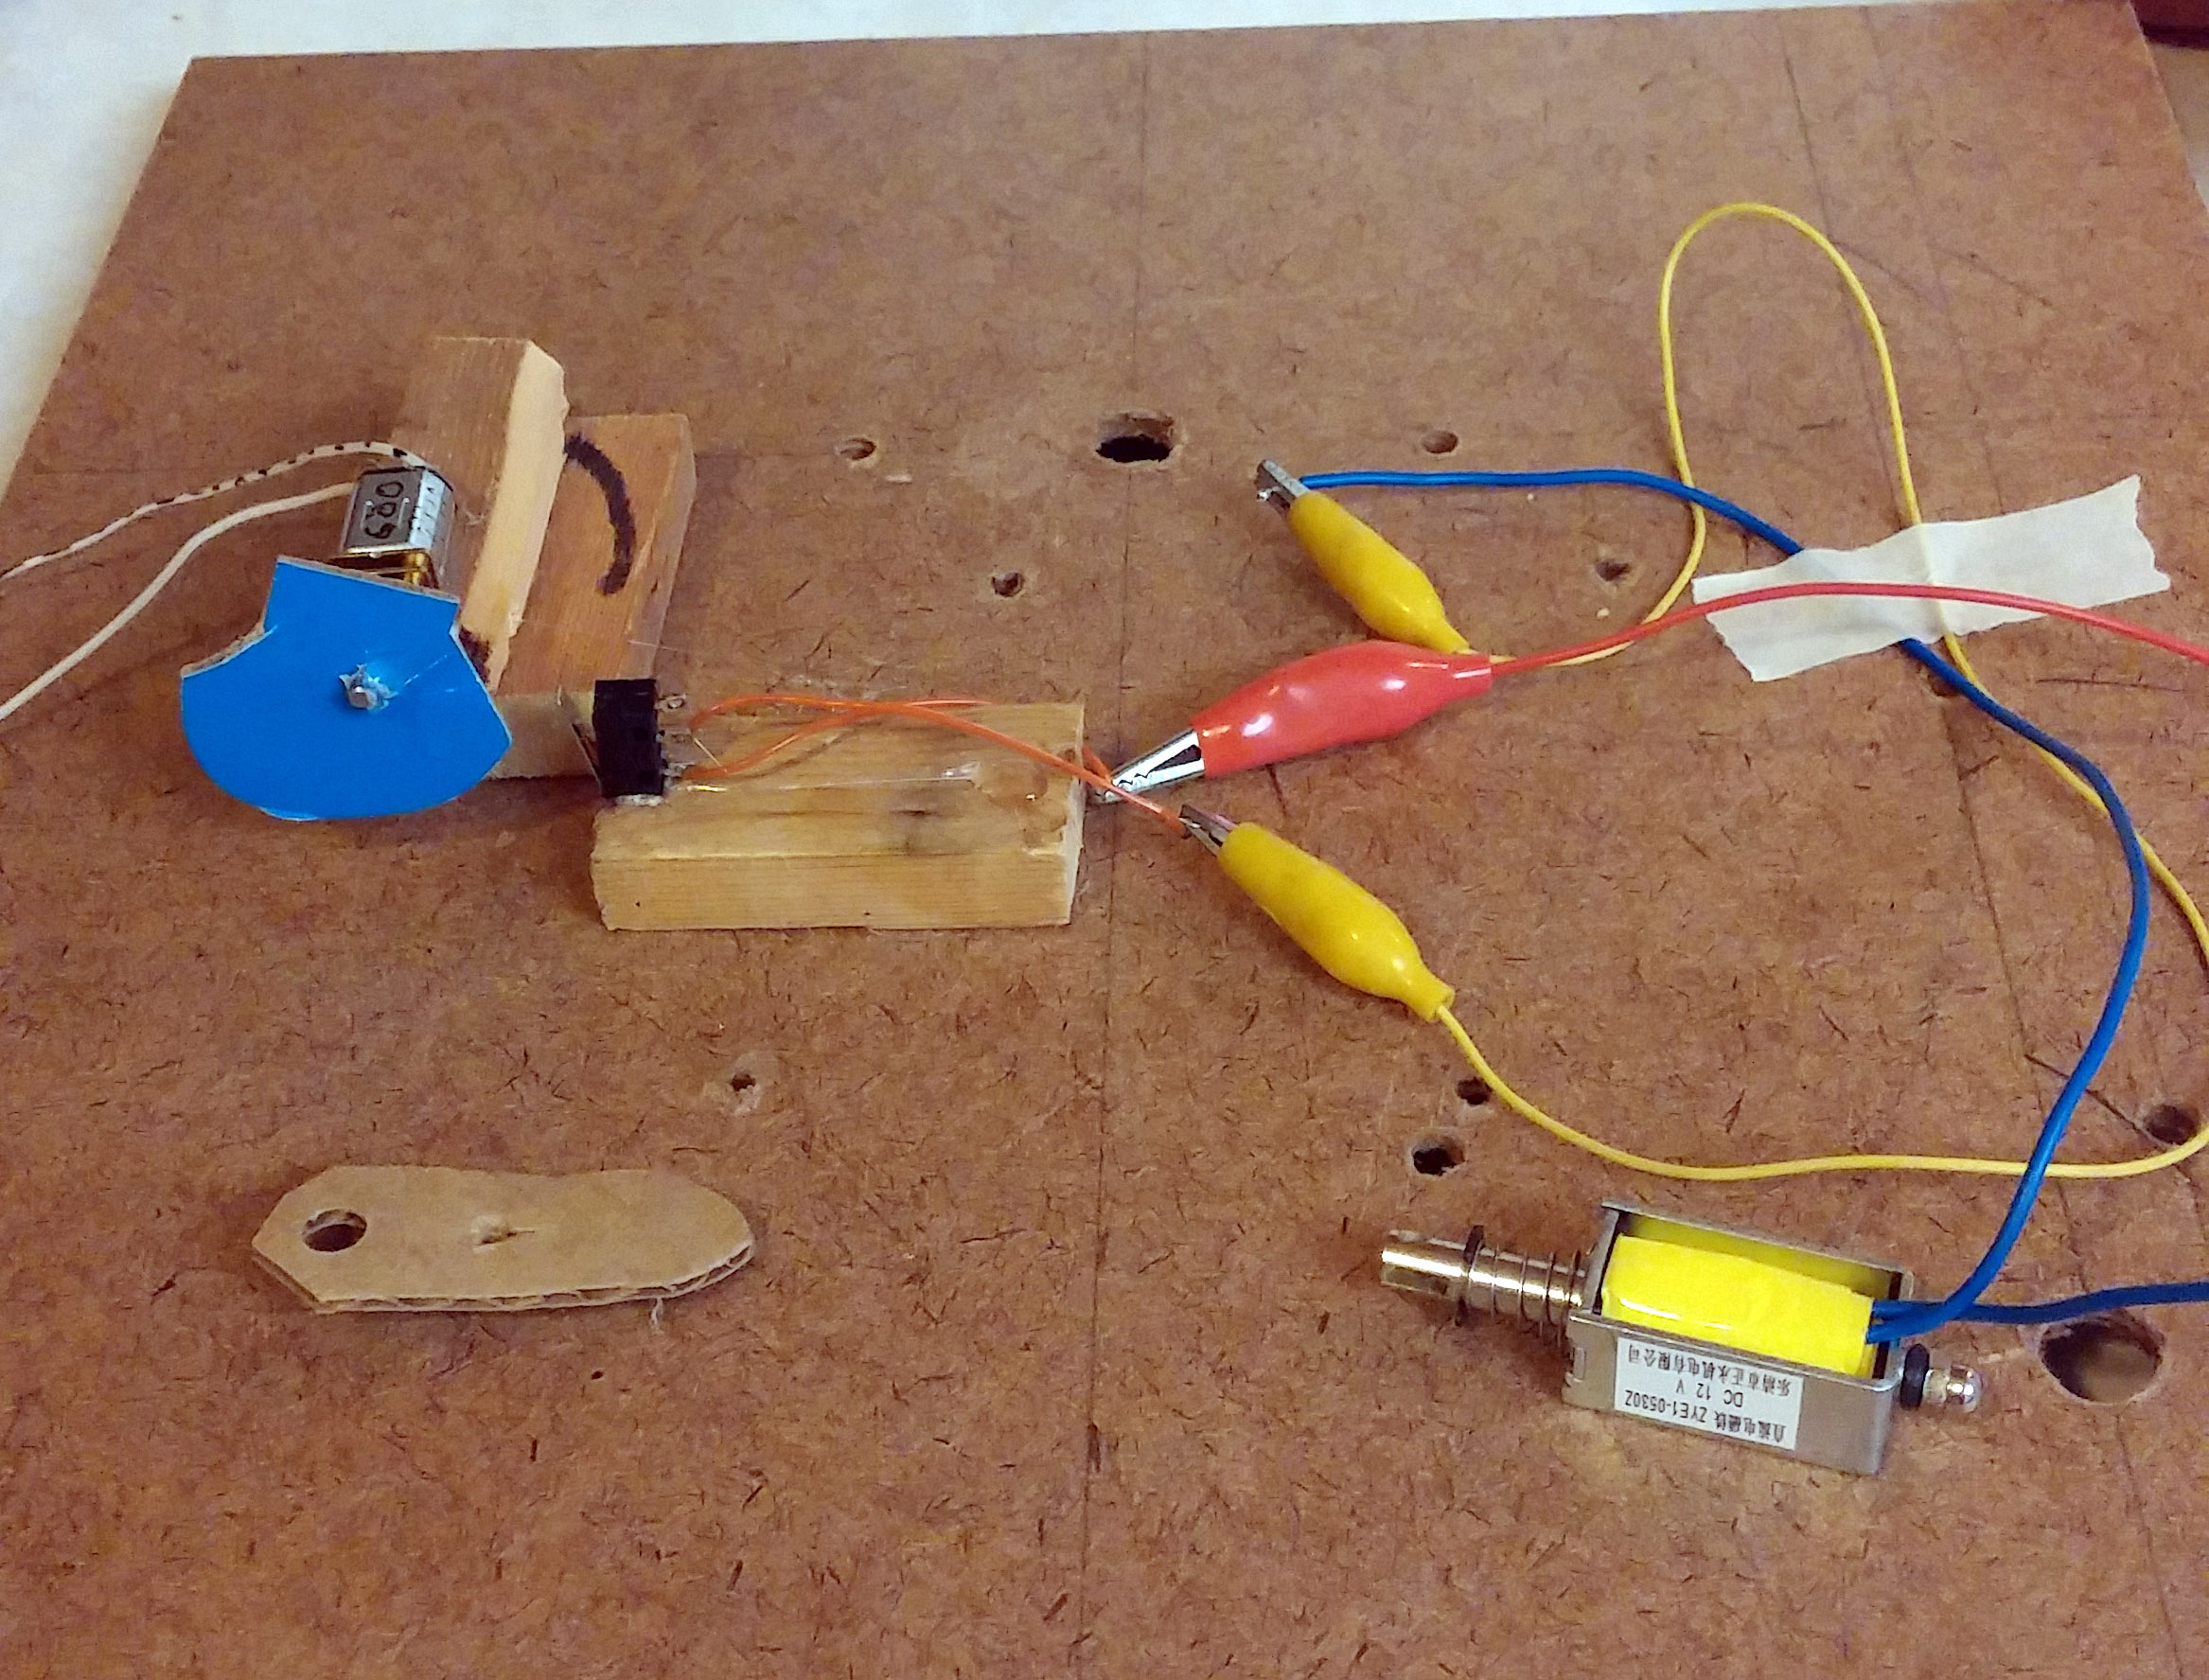
You can see my little blue cam that I also used hot glue for. I glued it to the motor shaft for a temporary attachment. Hitting the switch with the first cam — the brown pointy one you can see laying there — didn’t keep the switch activated long enough to fire the solenoid properly so I made the blue cam that kept the switch activated for about 5 times as long.The hot glue made it very easy to swap cams and re-glue.
The motor rotates at 300 to 600 RPM depending on the voltage applied (3 to 6 volts). That was way too fast with either cam, so I had to find another solution (see my post about using the Arduino instead of a motor). But the mounting techniques of wood blocks and hot glue have been a big headache-reliever for me over trying to find or fabricate metal mounts.
Make animatronics and mechatronics for hobbies, Halloween, Christmas, and more! It is so much fun to learn how to design, build and run simple machines and animatronics for Halloween and Christmas props! You can learn how to make arms swing, skeleton heads pop up, and much more. I’ve always loved Halloween and love playing with levers, motors, pulleys, and such. My first real interest came when I volunteered as an actor in a haunted house. Then I got interested in mechatronics and animatronics. Of course I love the really sophisticated ones you see in the professional haunted houses, but even the small ones you see in your neighbor’s front yard are very cool.
So how to get started in building those fun props for yourself? Well, I bought a bunch of little animated toys from the craft store and ripped them apart to see how they work. And now you can see how they work without ripping yours apart! I’ve put together an ebook, a bunch of vidoes, and a slew of photographs to show you how these things work. And what’s even better is that I’ve made it an instant download so you can be learning within minutes! Take a look at this fun DVD here. This information was not easy to find, and most of it was not laid out in a simple and straightforward way. So I think you are really going to be pleased with this kit!Check the items below at eBay for so much fun you won’t be able to stand it!
I’ve always been fascinated by those in-store displays where the little muffin rotates around at the grocery store, or the coffin lid opens and the skull comes out at the Halloween prop store.
So I decided it was time I learned more about those little props and I’m going to tell you what I learned in this e-book and video kit on learning to make animatronics.
This information was not easy to find, and most of it was not laid out in a simple and straightforward way. So I think you are really going to be pleased with this book!
Getting Started
The first thing I did was search for books on the topic. Library, Amazon, eBay — there are not many! The best I could do was find some children’s books. They actually helped quite a bit!
Then I stopped at the local Michael’s craft store – that’s where I saw the chest with the skull coming out as the lid opens. That’s the one that really peaked my curiosity. So I just stood there and studied the mechanism each time the lid opened. You should do the same thing.
But wait! There’s more 🙂
Check the items below at eBay for so much fun you won’t be able to stand it!