Repairing a bad JQ6500 sound/voice/music/MP3 module

I have been using the JQ6500 modules for a couple of years in conjunction with Arduinos to add simple sounds to my little Halloween projects. In the past they have all worked just fine.
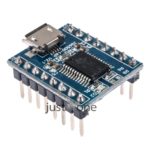
Back in August of 2017 I ordered 5 more of them from http://stores.ebay.com/chivazhu/   One just didn’t do anything when I plugged it in and four failed with the message that Windows could not recognize the thing. Obviously I don’t recommend that vendor!

(Yes, I ran out of my current supply and finally opened the package of bad ones about six months after I received them — let that be a lesson — test your stuff when it arrives — not six months later when you need them, and can’t even get a refund.)

I ordered from this vendor in May of 2018 and received them with no sound program either. So I do not recommend this vendor for them: https://www.ebay.com/usr/onlinehappyshopping?_trksid=p2047675.l2559

To help you maybe find ones that work when ordering from eBay/China, the ones I bought from other vendors have worked fine. Two of the vendors no longer sell them, but http://stores.ebay.com/caelectronics8/  still does, and the ones I got from them did work. In May of 2018 I got good ones from this vendor too: https://www.ebay.com/str/txhangelectronic

Just because I got good ones from them in the past is not a guarantee that I will in the future. And because I’ve had problems with other products from China, and because they take so long to get here, I often order from two different vendors when I buy things from China now. (At least I do that for the inexpensive things.) And I order a different quantity from each vendor so I know which ones came from which vendor (the packages they arrive in are labeled in Chinese so you can’t tell who they’re from unless you can read Chinese).

If you order two from each vendor, and one set is bad, you won’t know which vendor the bad ones came from. But if you order two from vendor A, and three from vendor B, then you can tell who is who.

Back the to problem… I looked the bad ones over closely and noticed that a few of the pins on the main chip were not soldered to pads. The pads didn’t even look like they had metal on them to be soldered to. But I tried to solder them anyway. Of course, with surface mount chips, repair is never easy and I ruined it. Two down, three to go. (It turns out those pins look that way on all of them and are not the problem.)

So I went looking on the internet for solutions. I googled ‘jq6500 doesn’t work’. I wasn’t hopeful, but I did find a fair amount of information about the problem. I learned from this site https://sparks.gogo.co.nz/jq6500/index.html  that apparently some of the manufacturers don’t include the Chinese music program on the chip that’s necessary for the thing to work!

That site has some good info, including links to other info and solutions. One link went to a guy who has a fix! He never comes out and says it (that I can find) but I think he created the fix. That site is https://github.com/NikolaiRadke/JQ6500-rescue-tool

I don’t really understand github so I did some more research. I found this video which really got me started in the right direction https://www.youtube.com/watch?v=9h_RWsfRnY4&vl=en

He offers instruction on using VMware Player to fix the  problem for Linux, but it helped me a lot even though I’m using Windows 10. I decided to make a boot CD seeing as I still have about 100 blank CDs laying around, rather than try the VMware.

Check his follow up video that helped me on the second problem you’ll probably run into about compatibility if you use Windows 8 through 10 https://www.youtube.com/watch?v=dcY47Dzef

He refers to the github site too, so I figured it was ok to download a .exe file from there.

So I followed some of the instructions from the github download, but they weren’t crystal clear to me on how to create a boot disk, so I did more research.

I found several mentions of ImgBurn for creating a boot disk; one mention was from the Microsoft site help pages. So again, as much as I hate to do it, I downloaded another .exe file from the ImgBurn site http://www.imgburn.com/

They don’t have great instructions either, but I managed to get through it and created a bootable CD with the Chinese Music program on it using ImgBurn!

I was able to follow the rest of the instructions from the github download page and now two of the JQ6500 modules work properly when plugged into a USB port. One works properly on a separate 5V power supply with no USB cable connected. The other one does not work with the USB unplugged and using a separate 5V supply.

The moral of this story? Test these (and all of your electronics) when you receive them, not six months later. And for these things, hope you get some that work and just get a refund for the ones that don’t. In my opinion, if you don’t need them right away, it’s just not worth the trouble to try to repair them.


Angle Grinder vs. Cut-off Tool

I take apart a lot of little gadgets and I can’t always find ways to get inside them (see dozens of my tear down videos on my Youtube channel). Either the screw heads are stripped, or parts (usually wheels on toy cars) are pressed onto shafts and I can’t get them off, or the thing is glued together and I need a saw of some sort to cut it in half.

I’ve been using a little Dremel tool with a cutting wheel which works great, but doesn’t cover enough distance fast enough, or can’t get deep enough to say, cut off axles that have wheels pressed onto them.

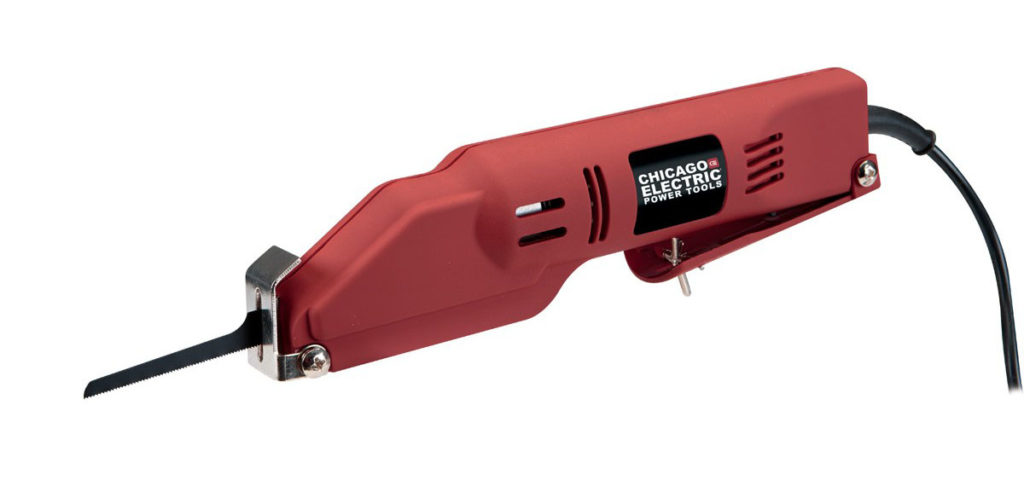
I tried a little reciprocating saw with a fine blade and also a medium blade, but it wasn’t much use.

Reciprocating Saw

reciprocating saw

So now I’m going to try a different approach — mentioned below. I’ll report back after I’ve used it a little.

I’m talking about two very similar tools — angle grinder and cut-off tool. I’ve learned some differences, a few that I haven’t seen mentioned anywhere else, so I thought I would share what I’ve learned.

Both tools can be used to grind things, or cut metal. Either grinding wheels or much thinner cutting wheels can be used on either. Accessories like hole saws and wire brushes can be used with an angle grinder — I’m not sure if they can be used on a cut-off tool.

Angle grinder

angle grinder

An average angle grinder typically uses 4-1/2″ discs, has a speed of around 11,000 RPM, and draws about 4 Amps. It has one or two handles that are usually moveable to at least two positions. Inexpensive ones have a screw to adjust the safety guard, more expensive ones have a quick-release lever.

Cut-off Tool

cut-off tool

The cut-off tool typically uses 3″ discs and has a speed of around 20,000 RPM, at 3 Amps. It only cuts to a depth of about 1″ and doesn’t have any handles. So it’s smaller, but faster, which I assume is the advantage of using this over an angle grinder for cutting things.

Safety tips

safety glasses

Both tools spew sparks and bits of painful and molten pieces from the wheels and from whatever you’re grinding or cutting. Good safety glasses are imperative.

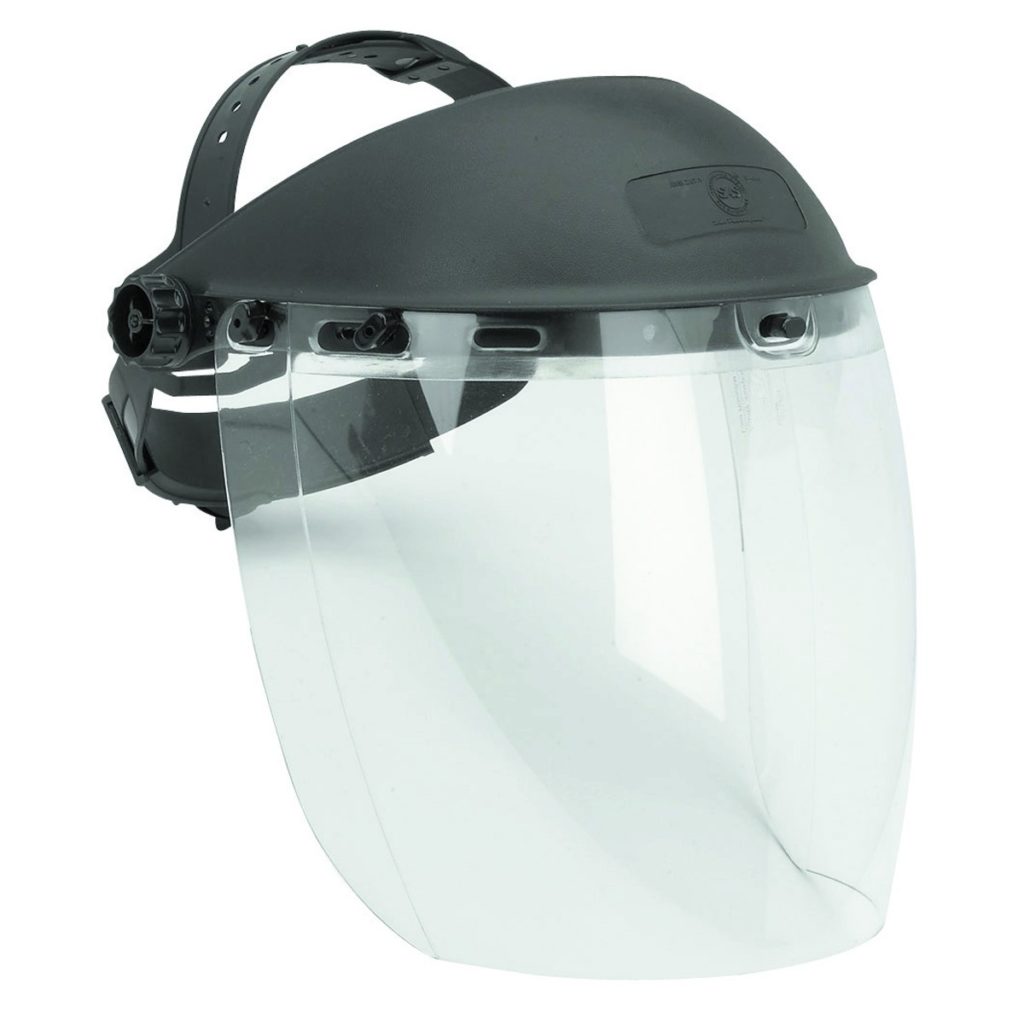
Safety face shield

Face shields are just as good an idea as safety glasses. It will keep sharp or molten chips off of your face, or heaven forbid — a shattered wheel flying into your face!

A dust mask and hearing protection can also be very good ideas.

dust mask respirator
Dust Mask / Respirator
ear plugs hearing protection
Hearing protection
leather work gloves
Leather work gloves

And don’t forget that protective gloves ara a good idea to help prevent injury to your hands from hot, flying debris, or if the material or tool get away from you. Gloves aren’t going to stop a cutting wheel, but may lessen injury, and will prevent or reduce injury from a grinding wheel.

5050 SMD (Surface Mount Device) LED Demo

Learn a little about a 5050 SMD (Surface Mount Device) LED. See my test bed and how I test warm white and cool white 5050’s.

They’re called 5050 because their dimensions are 5.0 x 5.0 mm. They operate at 60mA, 3V to 3.2 Volts. In my video I show that there are actually 3 LEDs in each 5050 package. So you could just light one or two of those and only use 20 or 40 mA if you want to reduce the current used.

I get the 5050 LEDs from Amazon here

Here’s a link to the copper tape

Digital Calipers

I get my alligator clip test leads locally, but these look pretty good if you need to order online

I have several of the battery holders with a built-in current-limiting resistor and on/off switch. Let me know if you’d like to purchase one for $3.95 and free shipping.

Basic Arduino LED Circuit

A short video showing how to extend a simple circuit out from the Arduino.

Here’s a source for breadboards on Amazon: http://Amazon: http://amzn.to/2CHpeLK

You can get a set of 3 Arduino Nanos here: http://amzn.to/2mbrbsG .  You can’t beat the price of these Chinese clones, but know that you will need to solder the headers on,  and you may need to download a driver for these Chinese clone boards. See how I do that in my video here: http://mechatronicsworkshop.com/index.php/2017/12/14/arduino-nano-prep/

You can purchase clones with the headers already soldered on if you search for them. Be careful buying clones — these appear to come from a warehouse in the U.S. so shipping is quite fast to the U.S.  But be careful that you don’t buy them from  a supplier who ships from China unless you or ok waiting for three to four weeks to get them delivered.

If you want to pay more and have the headers soldered on and no need to download a driver, go to the Arduino.cc site and purchase the original boards there.

Elenco is a great company to find larger breadboards, and all sorts of fun electronic stuff: http://amzn.to/2maSIun


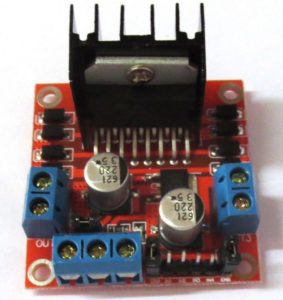
The L298N H-bridge motor controller module basics

Get an L298N module at Amazon

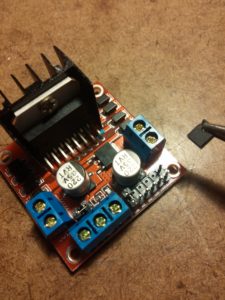
Oh boy, was I confused about this module at first! I found a fair amount of bits and pieces about it, but could not find the complete info that I was looking for. So I decided to create this tutorial for others who want to understand it better. I’m not an expert, but I have figured it out well enough to make what I think is a very clear and complete basic ‘primer’ on this device. Whether it’s right for your project is up to you to determine, but here’s info about the module itself, and especially about the mysterious jumpers (at least they were the biggest mystery to me).

You can see the data sheet on the ST website here: http://www.st.com/en/motor-drivers/l298.html .

You could just purchase the chip and component parts and wire up your own parts, but this complete module is probably cheaper than the combined parts, and it’s certainly more convenient. As of January, 2017, the modules are selling on ebay for under $2.00! At this price they’re from China of course, but you can purchase them at higher prices in the United States if you can’t wait for the long shipping times from China.

I’ve read in forums that the L298 chip is about 15 or 20 years old, so there are better(?) chips available now. People seem to like the Pololu A4988 https://www.pololu.com/product/1182 .  Stepper motor current limiting is apparently one of the big improvements, but none of the current-limiting chips come in this neat module format that I’m aware of. So this L298N module is fun and handy, certainly great for testing and little projects, but be careful if you need current-limiting features when driving stepper motors.

You can see the Input (IN) pins clearly, and here is a photo of the enable pins with me removing the jumper block. Click the photo to see a larger version.

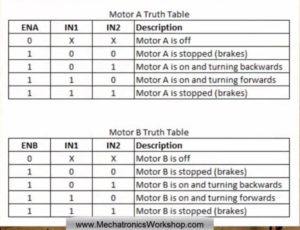
L298N Truth Table

Get an L298N module at Amazon


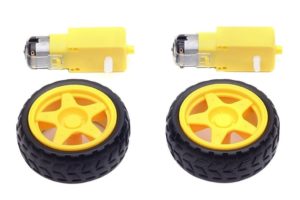
Get fun motors with robot wheels.
A tremendous buy!


Get an L298N module at Amazon

Arduino Nano Prep

You can get quite a variety of Arduinos. My favorite is the Nano. Here’s how I get them ready for my projects.

Here’s a source for breadboards on Amazon: http://Amazon: http://amzn.to/2CHpeLK

You can get a set of 3 Arduino Nanos here: http://amzn.to/2mbrbsG .  You’re going to want more than one for more projects, and you’ll probably accidentally destroy one or two of them by connecting the wrong wires, applying too high of voltage, etc.

You can’t beat the price of these Chinese clones, but know that you will need to solder the headers on,  and you may need to download a driver for these Chinese clone boards. See how I do that in my video here: http://mechatronicsworkshop.com/index.php/2017/12/14/arduino-nano-prep/

You can purchase clones with the headers already soldered on if you search for them. Be careful buying clones — these appear to come from a warehouse in the U.S. so shipping is quite fast to the U.S.  But be careful that you don’t buy them from  a supplier who ships from China unless you or ok waiting for three to four weeks to get them delivered.

If you want to pay more and have the headers soldered on and no need to download a driver, go to the Arduino.cc site and purchase the original boards there.

How to Make a Rotating Head

Here’s a short video showing how to make a simple rotating head. It’s a silly little project, but it’s fun and it’s easy. If you’ve got kids interested in this stuff, it’s a great project to do with them. Or use it yourself to learn how to create and use a prototyping box of some kind (cardboard, plastic, metal), mounting and wiring a motor, and so on.

Maybe just be happy that you built a cute little toy — or get more sophisticated with the idea. You could cover the box completely with black and maybe mount and shine a little LED spotlight on the rotating head for a scary Halloween prop! (Similar to the LED spotlight on my swaying spider project. You could even add a motion-sensing switch to have it start when somebody comes near it.

You could expand on this even more and learn how to use an Arduino and a motor controller to make the head spin in both directions, or add a sound card and speaker to add some peculiar sounds!


Click the photos below to get the parts mentioned in the video.

Digital Calipers

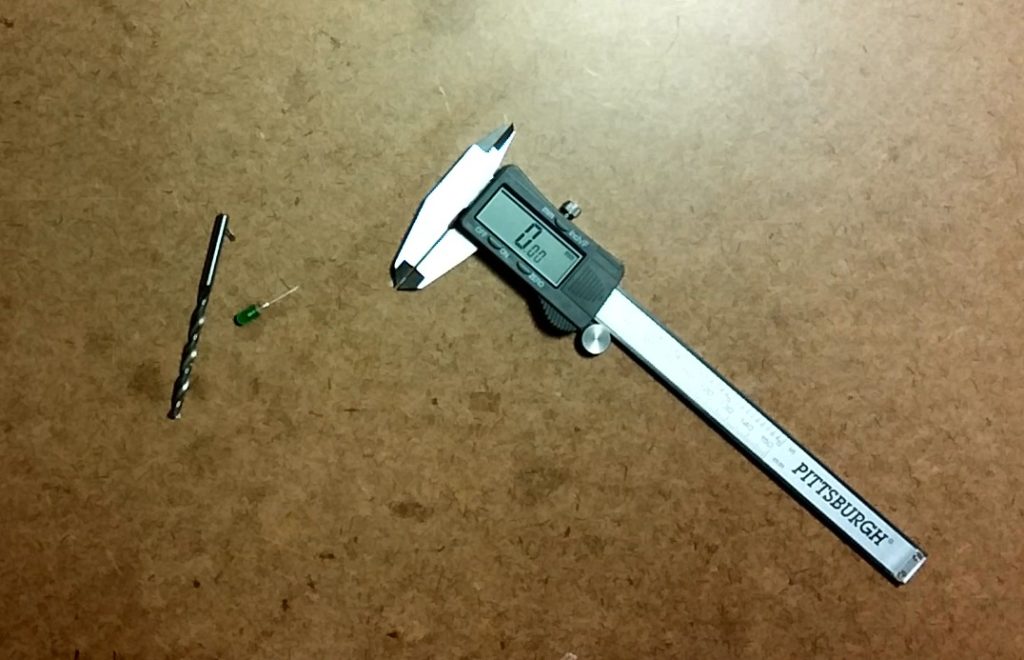
A digital caliper is a great tool to have around for all kinds of measurements. An example of how I use the caliper: When I want to use LEDs in one of my projects, I like to find a drill bit just a little smaller than the LED without drilling a bunch of trial and error holes. That way the LED will be a nice pressure-fit in the hole and won’t need to be glued into a hole that is oversized.

Here are some at Amazon: http://amzn.to/2BR4MZ0

See much more on calipers in my blog here.

Arduino project with blinking button, siren and LEDs

A fun little project idea that tempts potential ‘victims’ with a blinking button that says, “Do NOT Press This Button!” When pressed, it sets off a siren and blinking LEDs. Let’s see who can resist!

https://youtu.be/cNre5t8PQZA

I think it’s better to hide the cable that connects the button to the LED box. I just used what I had handy to cover the cable — two Christmas toys I had nearby. I would use something more appropriate if this was going to be anything more than a quick test setup. Wireless would be the best… maybe next time.

If you’re an Arduino fan, here’s a little side note about the LEDs. It was necessary to blink the LEDs using millis instead of delay so the button LED, the siren, and the different blink rates of the LEDs all worked at the same time.